Syntax#
Graphs are defined via facts using predicates node, edge,
graph and attr.
Note
A custom prefix for the predicate names can be defined to avoid clashes with other existing predicates.
This is done via command line argument --prefix.
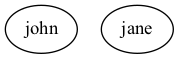
Nodes#
A node is defined using predicate node where the argument is an
identifier.
Example 1
node(john).
node(jane).
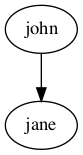
Edges#
An edge from A to B is defined using predicate edge
where the argument is a tuple (A,B). The edges will be directed
when creating a digraph and not directed one created a graph.
Example 1 (continuation)
edge((john,jane)).
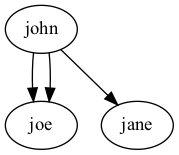
Multiple edges#
To generate multiple edges between nodes, the edge will be defined with a tuple of size three: (A,B,N).
In this case, an edge between A and B will be identified by N.
Example 1 (continuation)
node(joe).
edge((john,joe,1)).
edge((john,joe,2)).
Graphs#
A graph is defined using predicate graph/1.
Example
graph(family).
Multiple graphs#
Multiple graphs can be defined within the same set of facts. Each of them will generate a different graph. In order to assign a node or edge to a specific graph we add the identifier of the graph in the second argument.
Warning
All nodes and edges defined with a
single argument are assigned to the default graph called
default. A different graph can be defined as the default as an option.
Example 2
graph(toms_family).
graph(bills_family).
node(tom, toms_family).
node(max, toms_family).
edge((tom, max), toms_family).
node(bill, bills_family).
node(jen, bills_family).
edge((bill, jen), bills_family).
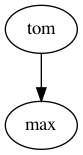
Graph toms_family |
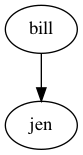
Graph bills_family |
Note
The creation of multiple graphs is especially useful for representing a dynamic domain where we need a different visualization for each time step
Subgraphs#
Subgraphs can be defined by adding a parent graph as a second
argument to the graph predicate. Then, nodes and edges can be assigned to a subgraph or a graph in the same way.
Example 3
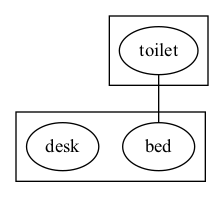
graph(house).
graph(bathroom, house).
graph(bedroom, house).
node(toilet,bathroom).
node(bed,bedroom).
node(desk,bedroom).
edge((toilet,bed),house).
Attributes#
The attributes of an element (graph, node or edge) are defined using
predicate attr. This predicate will add any attributes accepted
by graphviz (see here)
specified by name-value pairs to the element.
Note
Notice that the graphviz documentation specifies which attribute are available for which elements. Also, in the bottom it states the engine that needs to be used.
For instance, attribute pos, is only avaliable for engines neato and fdp.
Therfore, one of these engines needs to be selected with with argument --engine.
attr(ELEMENT_TYPE, ELEMENT_ID, ATTR_NAME, ATTR_VALUE).ELEMENT_TYPE: The type of element: can begraph,nodeoredge. Additionally, the element typesgraph_nodesandgraph_edgesassign an attribute to all nodes/edges of a graph identified withELEMENT_ID.ELEMENT_ID: The identifier of the elementATTR_NAME: The name of the graphviz attributeATTR_VALUE: The value of the graphviz attribute
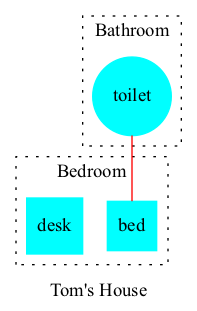
Example 3 (continuation)
attr(graph, house, label, "Tom's House").
attr(graph, bathroom, style, dotted).
attr(graph, bathroom, label, "Bathroom").
attr(graph, bedroom, style, dotted).
attr(graph, bedroom, label, "Bedroom").
attr(graph_nodes, house, style, filled).
attr(graph_nodes, house, color, cyan).
attr(node, toilet, shape, circle).
attr(node, bed, shape, square).
attr(node, desk, shape, square).
attr(edge, (toilet,bed), color, red).
Note
To edit the attributes of the default graph one must use the default name as element id.
Note
If an attribute name appears more than once all occurrences will be concatenated.
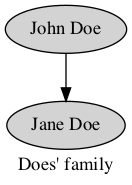
Example 1 (continuation)
attr(graph, default, label, "Does' family").
attr(graph_nodes, default, style, filled).
attr(node, john, label, "John Doe").
attr(node, jane, label, "Jane Doe").
Template attribute#
Attributes can also be formatted using templates with Jinja
(See the template syntax here ).
The template is defined as any other value before: when the ATTR_NAME is a constant,
the ATTR_VALUE will be considered a template.
The template is then rendered using the variables provided in additional attr predicates,
where the name ATTR_NAME is a tuple (ATTR_NAME, VARIABLE)
and the corresponding ATTR_VALUE is the value of the given variable.
If multiple occurrences of a variable name appear, then the latest appearance will overwrite any previous ones.
We can see an example bellow, where the value of attribute label is template "<<b>{{name}} {{lastname}}</b>>"
in which variables enclosed under {{ }}` will be substituted by those provided in the other predicates.
The next lines give values to such variables by using the tuples (label,name) and (label,lastname) as attribute names.
As a result, the value of label will be "<<b>Michel Scott</b>>".
Moreover, this label corresponds to an HTML-Like label, since it is encosed by <>.
Particularly, the tag <b> used in this label will make the font boldface as seen in the figure bellow.
Example 4
node(mike).
attr(node, mike, label, "<<b>{{name}} {{lastname}}</b>>").
attr(node, mike, (label,name), "Michel").
attr(node, mike, (label,lastname), "Scott").

If no template is provided, the default template will simply concatenate all variable values in order.
This is done using the special variable data which is a dictionary containing all defined variables.
The default template: {% for k,v in data | dictsort %}{{v}}{% endfor %} uses the for statement,
and the filter operation dictsort to iterate over the items in data after sorting.
In the example below, no template is provided for attribute label of node jim.
Therefore the value will be HalpertJim, as variable names are ordered in an ascendent fashion.
Example 4 (continuation)
node(jim).
attr(node, jim, (label,name), "Jim").
attr(node, jim, (label,lastname), "Halpert").
Attribute names can also be tuples of size three: (ATTR_NAME, VARIABLE, KEY).
In this case the VRIABLE will be a dictionary where the key KEY has value ATTR_VALUE.
In the example below, the variable name will have as value the dictionary {'first':'Pamela', 'second':'Morgan'}`.
This dictionary can then be accessed in the template using {{name['first']}} and {{name['second']}}
Example 4 (continuation)
node(pam).
attr(node, pam, label, "<{{name['first']}} {{name['second']}} <b>{{lastname}}</b>>").
attr(node, pam, (label,name,first), "Pamela").
attr(node, pam, (label,name,second), "Morgan").
attr(node, pam, (label,lastname), "Beesly").
Similarly dictionary variables can be iterated in the template like the example below.
In this case we iterate through the key-value pairs in name in no specific order.
Example 4 (continuation)
node(angela).
attr(node, angela, label, "<{% for k, n in name.items() %}{{n}} {% endfor %}<b>{{lastname}}</b>>").
attr(node, angela, (label,name,1), "Angela").
attr(node, angela, (label,name,2), "Noelle").
attr(node, angela, (label,lastname), "Martin").
Warning
Notice that if no attribute predicates with name (label,name,_) are provided, then the variable name will be undefined and the operation name.items() will throw an error.
To avoid this, one can add a statement in the template to use the empty dictionary as default value: {% set name = name|default({}) %}
Warning
All variable names are transformed into strings (unlike key names which keep their type).
Although the variable names can be things other than strings, such as constants or tuples, these type of values wont be accessible in the template directly but through the data variable.
For instance in predicate attr(node, n, (label,1), a) the variable 1 is assigned value a.
Notice that 1 is not really a variable that can be accessed via {{1}} since this would be the number 1 rather than the variable.
Therefore, these variables should be accessed via the data dictionary like {{data['1']}}.
Note
Template strings might become large, however, in clingo one can not split a string into multiple lines.
To overcome the difficulty of working with single line strings, one can take advantage of the built in @concat function to separate the template into multiple arguments in multiple lines.